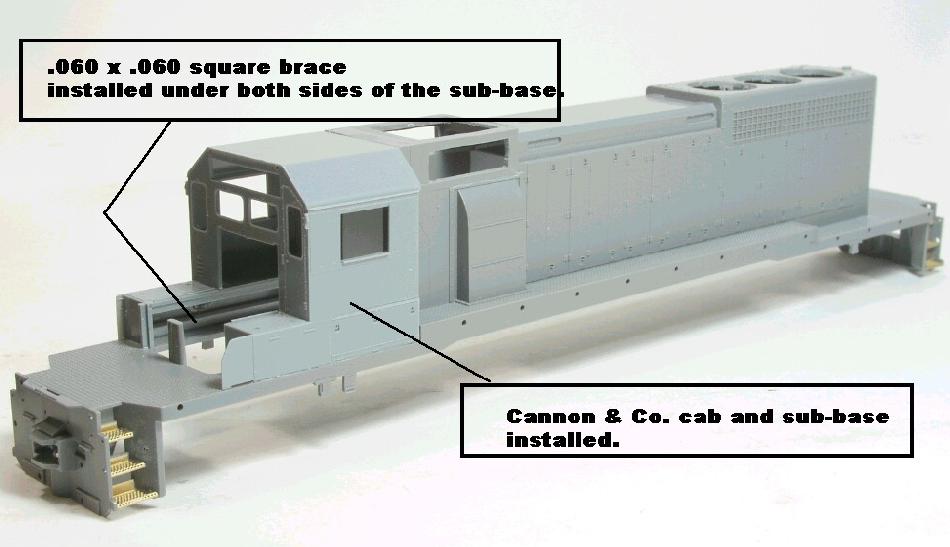
After the long hood has been glued to the walkway, we can then install the Cannon cab and sub-base assembly.
I chose to build the cab and sub-base and then glue them both together before installing them on the Kato walkway, but this choice is left up to you and will work either way.
Glue the cab and sub-base assembly to the walkway, making sure that the rear of the cab is flush with the cab end of the long hood and that both sides of the sub-bases are flush with both sides of the walkway. Allow to dry completely.
For added strength, I added a length of .060 x .060 square bracing under the sub-base where the two are glued to the walkway.
Allow to dry completely.
Step 012A
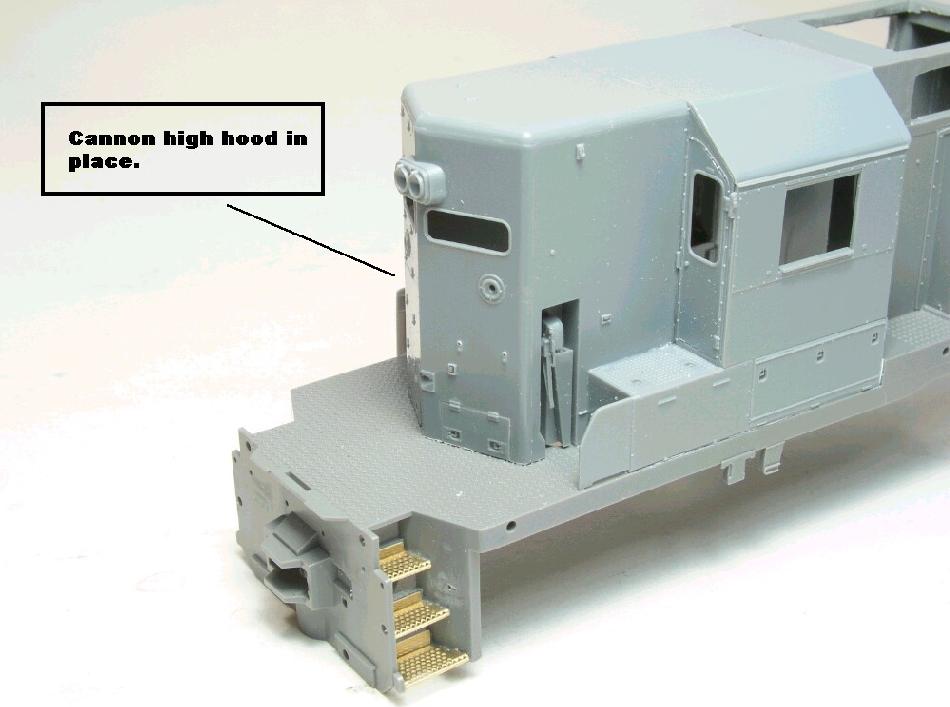
After carefully assembling the Cannon high nose, test fit your finished nose to the cab and sub-base.
I find that by using medium sized and strength rubber bands, you can temporarily attach the new nose to the model and be able to check for a tight fit or for areas that do not fit and will allow light to pass thru.
Hold your model up to a strong light and check for locations that do not fit or are not square.
These locations will be found along any seam where the high nose attaches to the cab face, sub-base or walkway.
The only place where light should come thru is under the two sanding doors found at the bottom of the nose.
Once you are satisfied with the fit of your new nose, cement it into place using your favorite plastic type cement. I do not suggest using Cyanopoxy or any brand of ACC type adhesive for this task as it will not make the type of bond needed for this part.
Step 012B
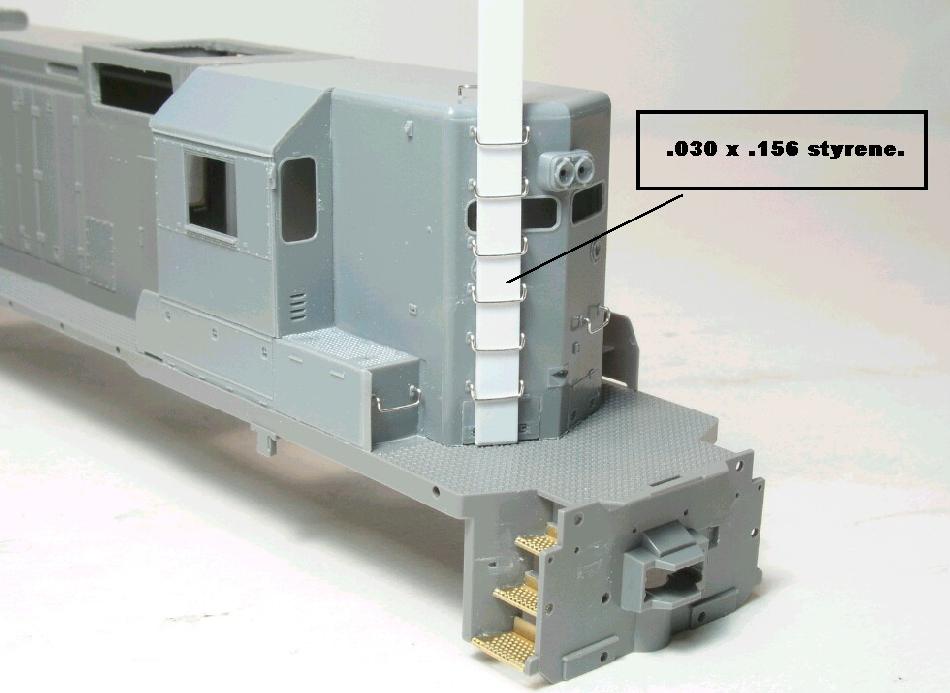
Most all grab irons that I have measured have been very close to three (3) inches from the locomotive body.
With this being the case, we can use a strip of .030 x .156 strip styrene to place behind our grabs and make fairly certain that they are all straight and all look the same.
Look at the scan below and see how I have placed this strip of styrene behind the grabs then pushed them all into place using a small flat tool such as the bottom of a #1 X-ACTO handle.
After they are in place, apply the Cyanopoxy or ACC adhesive inside of the shell to adhere the grabs to the nose face.
Now install all of the grabs on the short hood, short hood top, fireman's side battery box and on the long hood nose.